# Comments
See also the concept page.
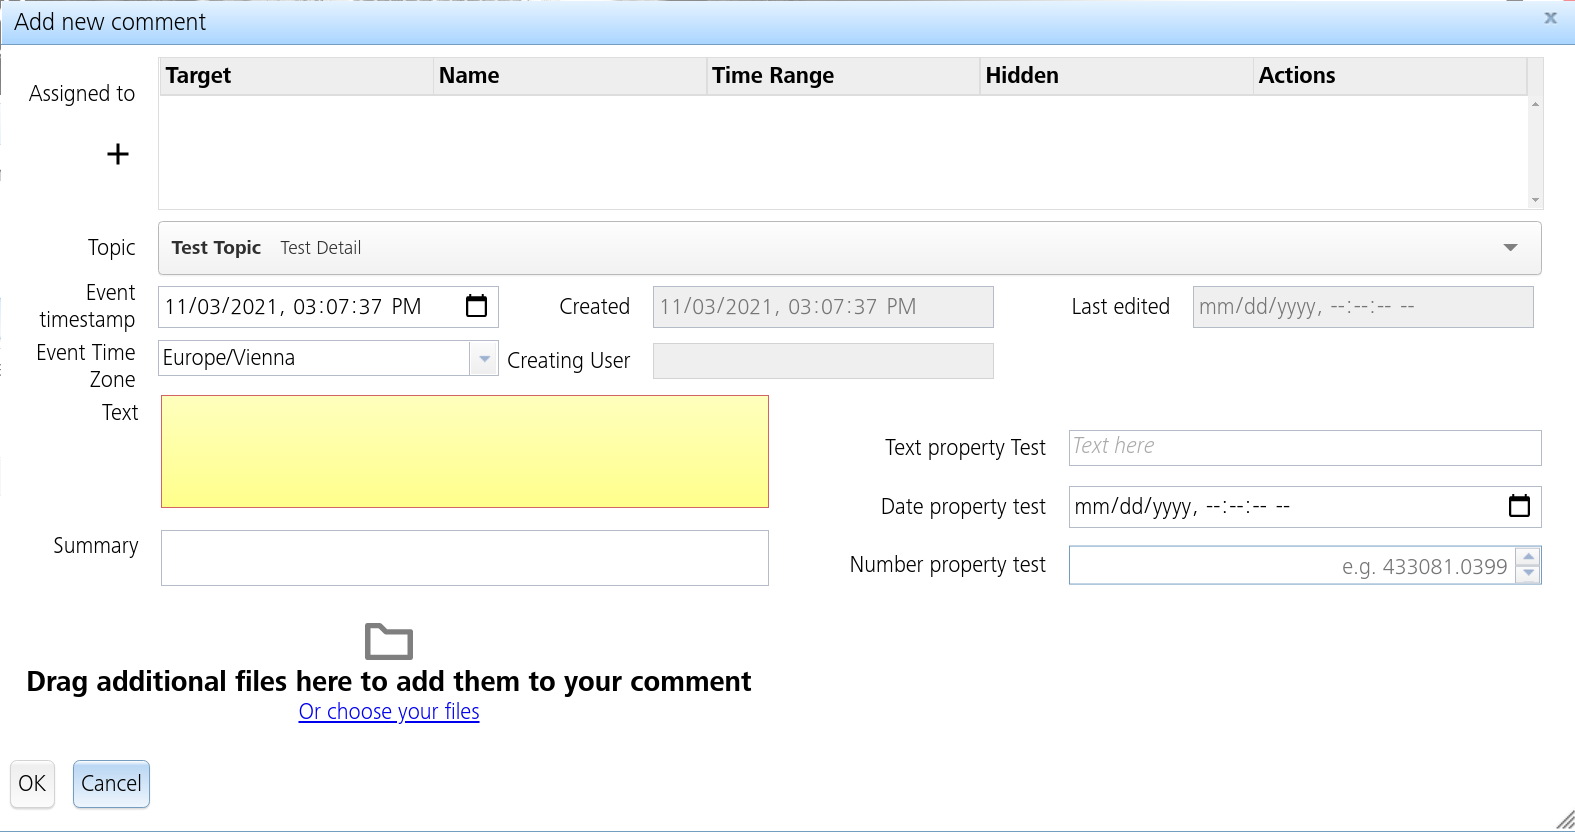
You can add a new comment and optionally assign it to any relevant MDA objects (measure points, time series, protocols, measure rounds).
# Comments Overview
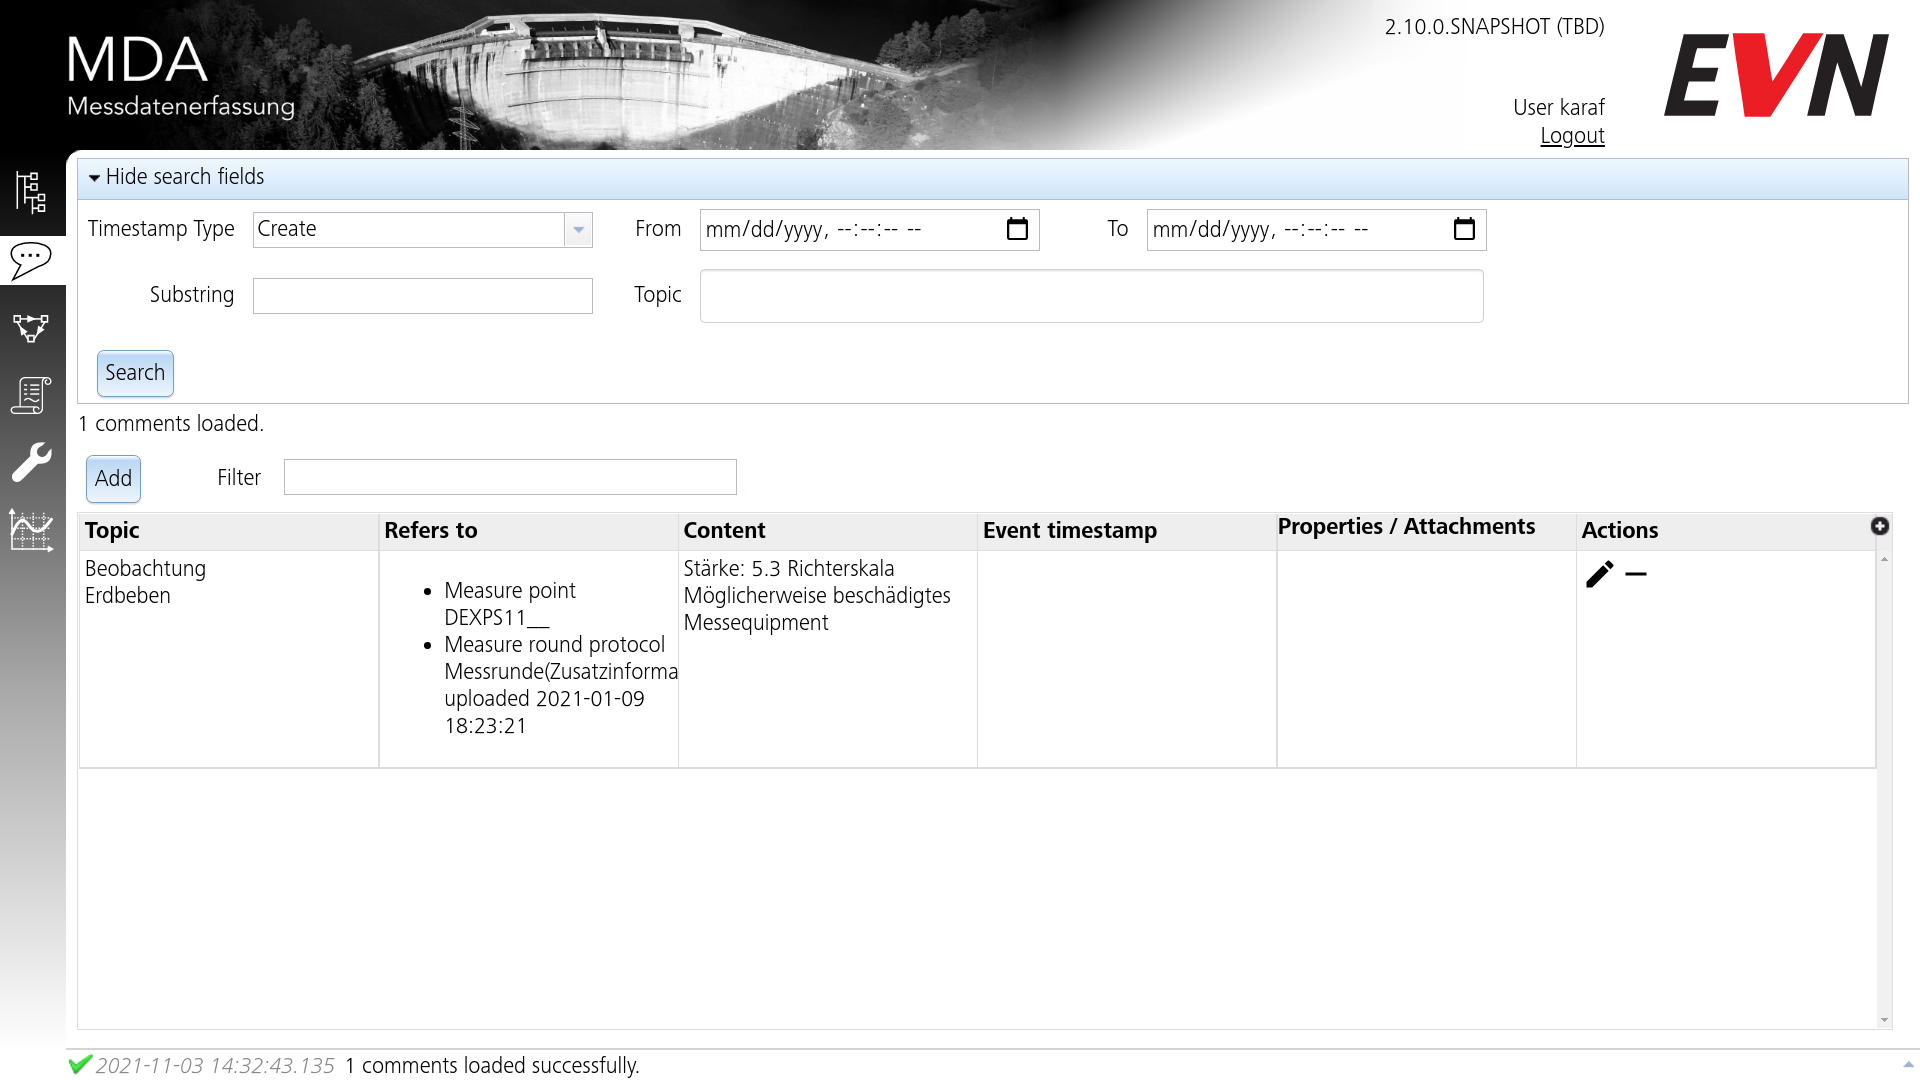
This is the root comments page. There are no predetermined filters like for its variants on the several configuration pages, all searches are generic by default. However, each user can still only see comments which they are allowed to see(have READ /comment/info permissions). Comments can only be added by users which have the WRITE /comment/info permission. It is recommended that you use somewhat strict filters if your system contains a lot of comments, otherwise the response time might suffer.
# Filter fields
- "From" and "To" allow you to specify a date range in which the comments should fall. The timestamp considered is the one set in the "Timestamp Type" field.
- "Timestamp Type" is a drop-down with three options: Create, Event and Finished. If you enter a date range for comments, this is the timestamp that is taken into consideration. Comments which don't have the specified timestamp set are, by default, included.
- "Substring" is a text fragment which, when specified, needs to appear in the "Content" field of the comment.
- "Topic" is a combo box that allows you to search only for comments with one of the specified topics.
If you don't want to restrict the values of a field, leave it unspecified. "Timestamp Type" is the only field that cannot be unspecified.
# Creating and editing comments
You can either click the "Add" button to add a new comment, or click on the pencil symbol on any found comments to edit them.

See here for a description of the property fields.
When adding a new comment, "Created" and "Creating User" are automatically filled in to be the current date respectively current user. Upon saving a comment, "Last edited" is updated to the timestamp on the save request was processed.
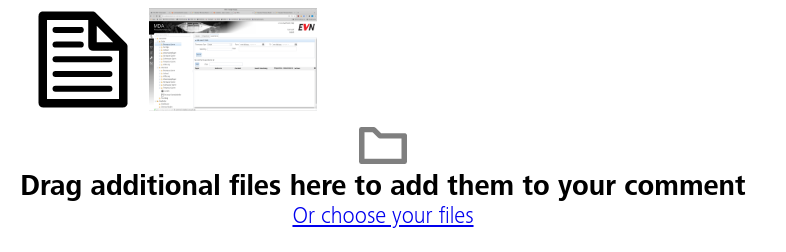
You can optionally add one or more attachments to a comment by dragging them in the designated area, or selecting them in the choose dialog. Uploaded files are represented by an icon determined by their data type. Images are shown as a minimized thumbnail. After they've been uploaded (the save command was processed after adding them in the dialog), you can see the file names upon hovering over them. Also, you can download them by a single click.
# Additional Properties
After having selected a topic (a.k.a. a comment category) in the drop-down, if there are any additional properties configured for that topic, they will appear on the bottom right of the dialog. The "Placeholder" will appear as a hint in empty text fields, and you can only enter values that conform to the data type configured for those fields. Comment properties can be configured by an admin on the comment property admin subpage.
Example of the three input field types: